What is whitening strips and why choose it over dentist whitening?
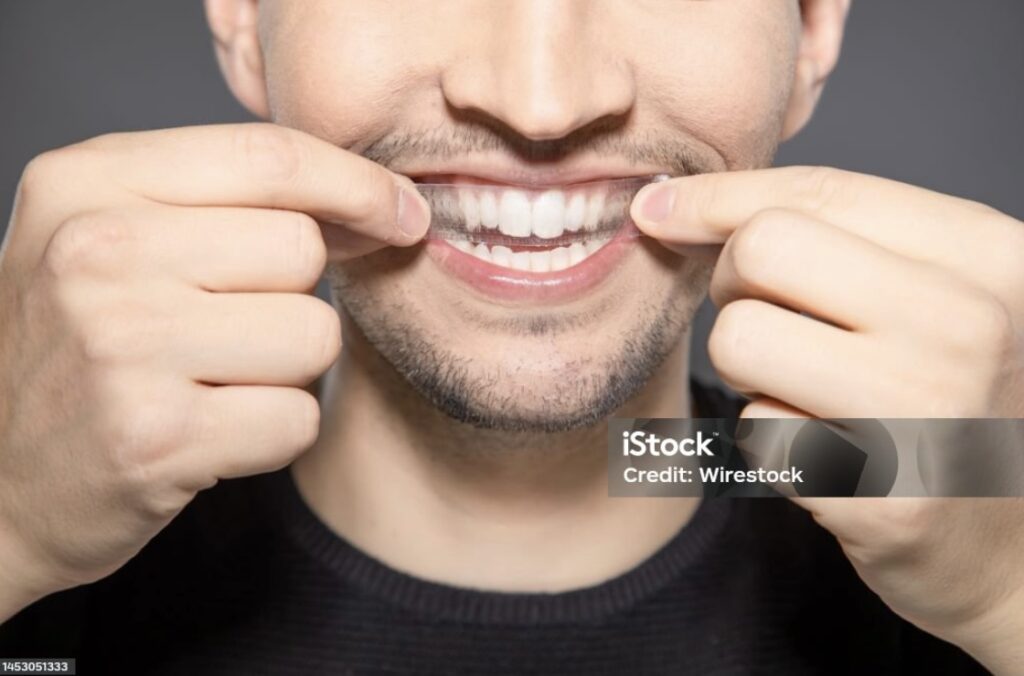
Whitening strips are thin, flexible pieces of plastic coated with a gel that contains peroxide-based whitening agents. They are designed to adhere to the surface of your teeth and help remove stains, making your smile visibly brighter. These strips can be a smart choice for several reasons, especially if u prioritize budget friendly, easy to use, and available over the counter approach.
Ingredients that help do the job
1. Hydrogen Peroxide
It is highly effective at oxidizing organic compounds that cause discoloration, leading to a noticeable whitening effect
2. Carbamide Peroxide
Carbamide peroxide works more slowly than hydrogen peroxide but can be gentler on teeth. It’s also effective at whitening, especially for those with mild to moderate discoloration.
3. Glycerin
While it doesn’t have a whitening effect itself, glycerin aids in delivering the whitening agents evenly across the teeth for more consistent results.
4. Carbomer
Like glycerin, carbomer doesn’t whiten teeth but improves the delivery and adherence of the active ingredients for better results.
5. Sodium Hydroxide
It supports the effectiveness of the whitening ingredients by stabilizing the formulation but doesn’t contribute directly to the whitening effect.
Step-by-Step Guide to Using Whitening Strips
Step 1: Choose the Right Strips
- Select whitening strips that suit your needs (e.g., sensitivity, strength, or quick results). Look for trusted brands and check the peroxide concentration if you’re worried about sensitivity.
Step 2: Read the Instructions
- Each brand has specific usage guidelines, including wear time and frequency. Follow these carefully to avoid overuse or irritation.
Step 3: Brush Your Teeth
- Brush your teeth gently with a non-whitening toothpaste before applying the strips. This removes surface plaque for better contact with the strips. Avoid flossing right before if your gums are sensitive.
Step 4: Dry Your Teeth
- Use a tissue or clean towel to gently dry your teeth. Whitening strips adhere better to dry surfaces.
Step 5: Apply the Strips
- Peel the Strips: Remove the strips from their packaging. Handle them by the edges to avoid smudging the whitening gel.
- Align with Your Teeth: Position the gel side against your teeth, starting with the upper strip. Press the strip gently to ensure full contact with the teeth.
- Fold the Excess: Fold the excess strip over the back of your teeth to secure it in place.
Step 6: Wait the Recommended Time
- Leave the strips on for the specified duration (usually 15-30 minutes). Avoid eating, drinking, or excessive talking during this time. After Then take off the strips
Step 7: Rinse Your Mouth
- Rinse with water to remove any residual gel. You can also gently brush your teeth with a soft-bristled toothbrush if needed.
Step 8: Post-Care Tips
- Avoid Staining Foods and Drinks: For at least an hour after using the strips, avoid coffee, tea, wine, and other staining substances.
- Hydrate: Drinking water helps rehydrate teeth and gums.
Step 9: Repeat as Directed
- Use the strips for the recommended number of days (e.g., 7–14 days). Don’t exceed the frequency listed to avoid sensitivity or enamel damage.
Potential drawbacks to using whitening strips
1. Tooth Sensitivity
Problem: Whitening strips can cause temporary sensitivity, especially in people with already sensitive teeth or exposed dentin.
Solution:
- Use strips designed for sensitive teeth, which have lower peroxide concentrations.
- Limit the frequency of use (e.g., every other day instead of daily).
2. Gum Irritation
Problem: Whitening gel may come into contact with gums, causing irritation or discomfort.
Solution:
- Ensure proper application by trimming the strips to avoid contact with your gums.
- Use a smaller amount of gel if applying manually.
- Rinse your mouth with water after use to remove excess gel.
3. Uneven Whitening
Problem: Whitening strips may not cover all teeth evenly, especially in crevices or on crooked teeth.
Solution:
- Make sure the strips are applied smoothly and pressed against all surfaces.
- Consider professional whitening trays for a more uniform result if uneven whitening persists.
4. Limited Effectiveness on Intrinsic Stains
Problem: Whitening strips are most effective on surface stains and may not work well for deeper, intrinsic stains caused by medication or trauma.
Solution:
- For intrinsic stains, consult a dentist about professional whitening options, such as in-office treatments or custom trays with higher-concentration gels.
5. Temporary Dehydration of Teeth
Problem: Whitening strips can temporarily dry out enamel, making teeth appear chalky or overly white right after use.
Solution:
- Allow teeth to rehydrate naturally by drinking water and avoiding whitening products for 24 hours.
6. Overuse Can Damage Enamel
Problem: Overusing whitening strips or leaving them on for too long can lead to enamel erosion or increased sensitivity.
Solution:
- Follow the product instructions carefully and avoid using whitening strips more frequently than recommended.
- Take breaks between treatments (e.g., every 3–6 months) to let enamel remineralize.
7. Ineffectiveness on Dental Work
Problem: Whitening strips do not work on crowns, veneers, fillings, or dentures.
Solution:
- Use strips only on natural teeth and consult a dentist for whitening options for dental restorations.
By understanding these potential drawbacks and implementing the solutions, you can use whitening strips effectively while minimizing side effects or issues.
